Navigating and Editing Your Project
In this help article we will be looking at how to navigate and edit your projects. A project will house all of your individual events. If you are running a Virtual Event with multiple sessions, typically you would have an individual project for this. If you are running a webinar series over a prolonged period of time, it may be better to keep these all in the same project. Now, lets explore the options within your project.
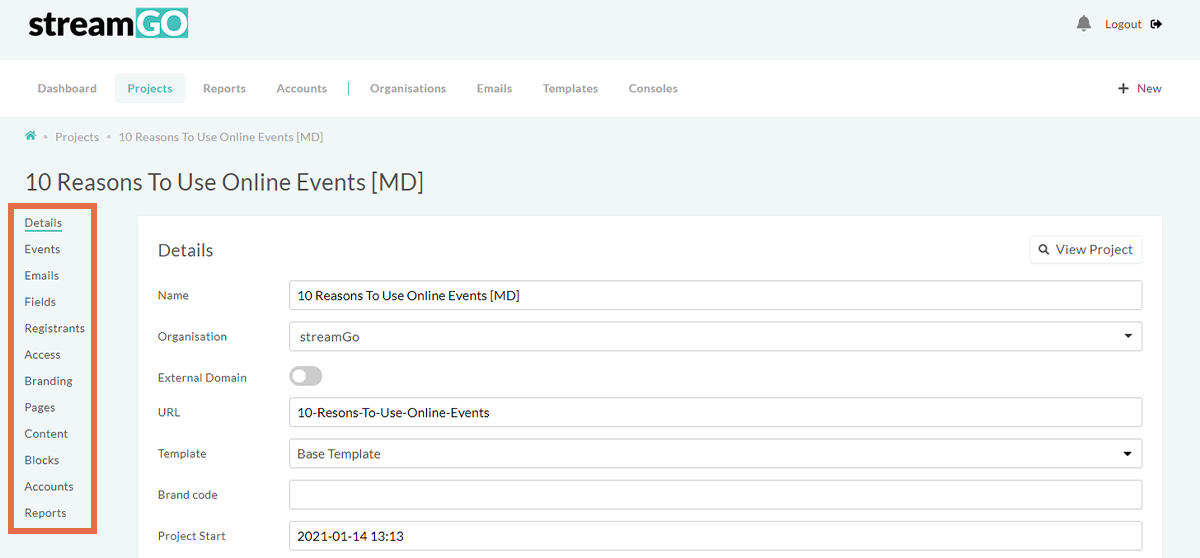
Firstly, login to the streamGo platform by visiting https://events.streamgo.live/dashboard and use your login details provided by your Project Manager. Once you're logged in, go to "Projects" in the top navigation bar. Find the desired project you would like to edit and click the title or pencil icon to view this. You will then be taken to the Details section of the project. We will explain all of the options on this page:
- Name: This is the name of your Virtual Event or the name or your webinar series
- External domain: This should only be toggled on if you are planning to use your own domain. For example, our streamGo domain is streamgo.co.uk
- URL: This will show the full URL if you are using your own domain. If not, it is the end of the URL and sits after https://events.streamgo.live/
- Template: This will have been set by our own build team here at streamGo, when your first event is created
- Brand Code: This is a free text field you can use to identify brands or publications internally
- Start and End Times: These should cover the entire project, so if you have multiple events within one project, the end time should be set to the end time of the final event
- Passcode: This allows you to set security on your event so that passcodes can be required to access events
- Leaderboard Exclusions: This field allow you to remove your own staff from any leaderboards included in your virtual event
- Registration Required: This means attendees have to register to attend your event
- Login Required: This means that those registered will need to login with their registered email to access the event
- Redirect to Login: This allows you to set your event to go to the login page first rather than registration. This is useful if you are uploading registrants or using an autoreg system
- Registration Email: This turns on or off emails being sent on registration
- Bot Protection: This should remove the possibility of bots registering for your event
- Auto Registration: This allows the creation of an autoreg link
- Daily Email Reports: This allows you to receive daily reports via email regarding any event registrations
- Events: A list of all the events that are part of your project. We explore the options within this section later in this article
- Emails: This is where you can create, clone and approve reminder emails. Read more about approving emails here, as well as scheduling emails here
- Fields: This is where you can add, remove and edit your registration form fields. First Name, Last Name and Email are all in as default and cannot be removed or edited. You can add different field types such as radio button, checkbox, dropdown lists, text, textarea and countries. The Field Ref should not contain a space, but should be populated
- Registrants: You can view, remove or upload registrants in this section. Find out more about how to upload registrants to your event here
- Access Restrictions: This is where you can choose to whitelist or blacklist certain emails or domains
- Branding: This allows you to hyperlink and upload a logo image, upload a background image and adjust the colours of your page
- Pages: This allows you to amend the layout of each page in your process. This includes the registration, login, thanks and event pages. These will typically be set based on previous events however elements can be removed if you wish
- Content: This allows you to add content to be displayed on each of the pages in your project. This will depend on the layout you have on these pages
- Homepage content will force users to hit the homepage until this is removed
- Registration content will appear on the registration page
- Registration email allows you to style out the email that your attendees will receive upon registering
- Thankyou content appears on the page after the registration is completed
- Login content appears on the login page
- Blocks: Allows you to customise content with Blocks on your pages. These will be set up by our build team for your first event and from there you can edit the content of each of these blocks
- Accounts: This is where you will assign which accounts can have access to elements of this project. The important account here is your presenter login, in order for your presenter to be able to access the presentGo console for this event they will need to be added to this accounts section
- Reports: Allows you to view analytics and statistics for your event. Read more on reports by visiting the Reports section of our Help Site.
Next we will look at the "Events" section of your project and functions within this. Within your project, select "Events" in the left menu. You will then see a full list of your events. Click on the name of the event or the pencil icon to edit. Once within your event, these are the sections available to you:
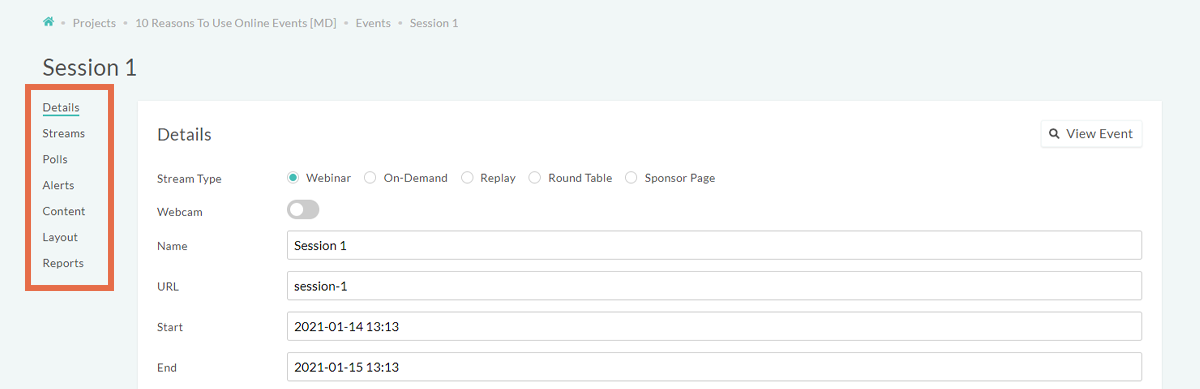
- Details: Here you can fill in appropriate details, upload PowerPoint files and turn on webcam options
- Streams: This section will be completed by the platform automatically or your producer on the day
- Questions: This is where you will manage the questions for your event
- Polls: You can add a poll directly against this event by clicking the create poll button. Find out more about creating polls here
- Alerts: These can be set up prior to an event. You can create as many alerts as you would like prior to the event. These alerts are then launched in the same way you would launch a poll
- Content: This is where you would add your webinar description
- Layout: This is where you can adjust the layout of the event page. By default this will be styled the same as the cloned event, however you can add or remove elements if you wish. These changes will affect the look and style of your page
- Reports: Here you can view at a glance reports and download more detailed reporting. You can also adjust the date by toggling off the automatic date option and selecting your own date range