streamGo Pro - How to create or update navigation items

How to Add to and Update your Navigation Menu

This article will show you how to create, update and move navigation items in your menu.
Note: You will need a Manager or Editor Account to perform these actions. You can read our user login types help article, here.

Article Contents:


Video walkthrough


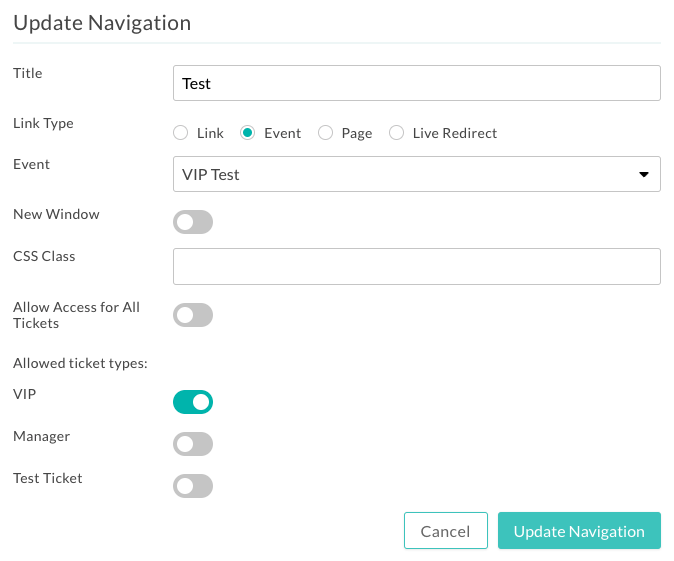
Create a Navigation Item

1
Select your desired Project from the list found in the top navigation.
2
From the Content menu select Navigation.
3
Click Create Navigation Item
4
Add the Details to the Menu.
  • Title as it should appear in the Navigation
  • Select the best Link Type
    • Link allows you to link to a webpage
    • Event allows you to link to an existing Event within your Project
    • Page allows you to link to an existing Page within your Project
    • Live Redirect allows you to add in a Navigation item that redirects the participant to the current Event in your Agenda
    Note: The Live Redirect is based on the times set against your events..
  • You can select if this opens in a new window
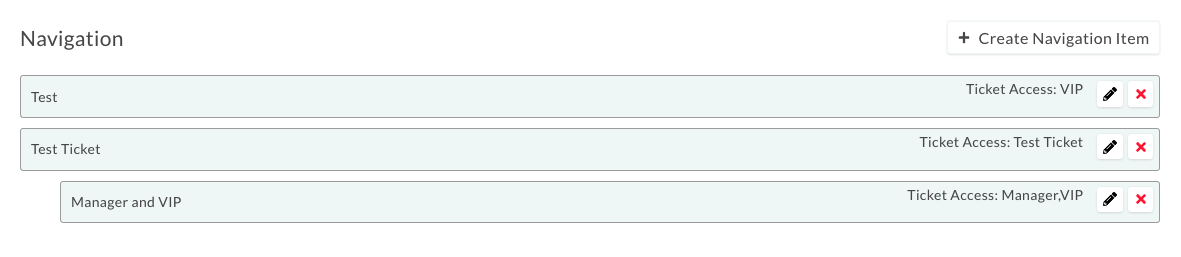
  • You can select to allow access depending on an attendees ticket type
5
Click Create Navigation.
6
You can then drag and drop the item to reorder your Navigation menu.

Nesting a Navigation Item

1
Select your desired Project from the list found in the top navigation.
2
Select Navigation under the Content menu.
3
You can drag and drop a Navigation Item to be positioned under another Navigation Item.

Updating a Navigation Item

1
Select your desired Project from the list found in the top navigation.
2
Select Navigation under the Content menu.
3
Click the Pencil Icon alongside the item you wish to amend.
4
Make the required amendments and click Update Navigation.
Did this answer your question? Thanks for the feedback There was a problem submitting your feedback. Please try again later.